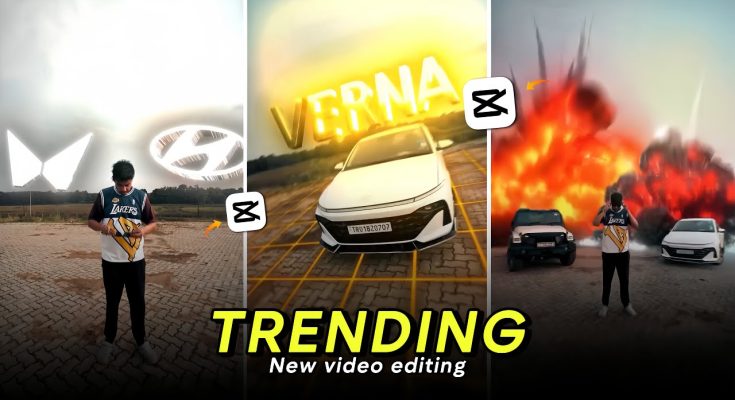
In the world of video editing, mastering dynamic effects can set your content apart, especially when working with high-energy footage like bike or car videos. One of the most impactful effects you can use is the Blast Effect, which brings a thrilling level of drama and intensity. Trending Bike & Car Video Editing Tutorial.
Perfect for action scenes, such as bike stunts, car chases, or high-speed moments, the Blast Effect grabs viewers’ attention and enhances the excitement. This guide will walk you through the steps of adding this trend-setting effect to your bike and car videos using Adobe Premiere Pro.
Understanding the Blast Effect
The Blast Effect is a powerful visual tool used in video editing to simulate an explosion or forceful impact, often seen in high-intensity action sequences. This effect adds a burst of light, debris, smoke, and sometimes sound to amplify dramatic moments, making scenes feel more cinematic.
For bike and car videos, the Blast Effect is ideal for moments like:
- High-speed chases
- Stunts, jumps, or flips
- Sharp turns or dramatic crashes
It adds an energetic, visceral feeling to your footage, drawing attention to key moments and enhancing the overall viewing experience.
Key elements of the Blast Effect include:
- Impact: A sudden burst of force to signify a dramatic change or collision.
- Debris: Flying objects or particles that scatter after the impact.
- Sound Design: Explosive sounds that sync with the visual blast to intensify the moment.
- Lighting: Bright flashes or lighting changes to emphasize the explosion.
Now, let’s dive into how to apply this effect to your bike and car videos.
Tools You’ll Need
Before we begin, ensure you have a professional video editing tool. Here are a few options:
- Adobe Premiere Pro: A widely used tool known for its flexibility and advanced features.
- Final Cut Pro X: A great option for Mac users with a smooth workflow.
- DaVinci Resolve: Known for color grading and advanced editing features.
- HitFilm Express: A free option with built-in effects, including explosions and blasts.
For this tutorial, we’ll focus on Adobe Premiere Pro. Make sure you also have high-quality bike or car video clips to work with.
Preparing Your Footage
Before editing, organize your footage in your video editing software. If you’re working with multiple clips, arrange them in the timeline to focus on the key moments where the Blast Effect will have the most impact.
- Import Clips: Import your bike or car footage into the software and select the moments where the Blast Effect will shine—such as stunts, high-speed moments, or crashes.
- Trim and Arrange: Use basic editing tools to cut and organize your clips in the correct order.
Now that your footage is organized, let’s add the Blast Effect.
Step-by-Step: Adding the Blast Effect in Adobe Premiere Pro
Step 1: Set Up the Timeline
Open Adobe Premiere Pro, create a new project, and import your video clips. Drag the clips into the timeline and trim them to focus on the moments you want to enhance with the Blast Effect.
Step 2: Choose the Scene for the Blast Effect
The Blast Effect works best in action-packed scenes. Pick moments like:
- Bike or car jumps
- Sharp turns
- High-speed chases
- Collisions
Focus on the frame or moment in your footage that will benefit most from the blast’s visual impact.
Step 3: Add the Blast Visual Effect
To add the Blast Effect, you can either use stock footage of explosions or create a simple blast effect within Premiere Pro.
- Using Stock Footage: Visit a royalty-free website (Artgrid, Storyblocks, etc.), search for explosion clips, and import them into Premiere Pro. Place the explosion clip above your footage, and use the Opacity Mask tool to shape the effect around the point of impact. Adjust the scale and position to ensure the explosion aligns with the bike or car action.
- Creating a Blast in Premiere Pro: You can create a simple flash using the Lens Flare and Lighting Effects. Navigate to Effects > Generate > Lens Flare, and apply it to the timeline. Adjust the intensity and size to create a glowing effect at the point of impact. Use the Lumetri Color panel for color correction to brighten the area around the blast.
Step 4: Add Debris and Dust
To enhance realism, add debris and dust particles around the blast. You can:
- Use Particle Effects: Apply the CC Particle Systems II effect in Premiere Pro to simulate dust or debris, and position it around the blast area.
- Use Stock Footage: Import stock footage of debris or dust and mask it around the blast for added realism.
Step 5: Add Sound Effects
The Blast Effect isn’t complete without the right sound design. Import royalty-free explosion sounds and place them on the audio track below your video. Sync the sound with the explosion to ensure maximum impact.
Step 6: Fine-Tune the Visuals
Once the main elements are in place, fine-tune the visuals:
- Color Grading: Use the Lumetri Color Panel to adjust the exposure, shadows, and highlights, emphasizing the explosion’s intensity.
- Motion Blur: Add motion blur to the debris and explosion elements to simulate their rapid movement during the blast.
Step 7: Review and Export
After fine-tuning, review the scene to ensure everything looks natural and cohesive. Pay attention to the timing of the explosion, sound design, and visual integration. When you’re happy with the result, export your video by navigating to File > Export > Media.
Advanced Tips for a More Impactful Blast Effect
To take your effects to the next level:
- Use After Effects: After Effects provides more advanced options, such as custom animations and 3D elements, which can make the explosion even more immersive.
- Add Camera Shake: Simulate camera shake at the moment of impact using the Turbulent Displace effect for added realism.
- 3D Animation: Use 3D models for your bike or car and create explosions that interact with the environment.
- Glow and Light Effects: Add glow or light flares to increase the dramatic effect of the explosion.
Conclusion
The Blast Effect is a powerful tool to elevate your bike and car videos, making them more intense and engaging. By following this guide, you’ll learn how to apply the effect in Adobe Premiere Pro, along with advanced techniques to give your videos a professional, cinematic feel.
With practice, you can create thrilling action sequences that captivate your audience and leave a lasting impression. Whether you’re editing for social media, YouTube, or professional projects, the Blast Effect will help your bike and car videos stand out.
Keep experimenting and pushing the boundaries of your editing skills to stay ahead in the game.


